Replace vCenter Server Certificate
vCenter server uses an automatically generated self-signed certificate after the installation. As with ESXi Server, this may not be desirable in some environment and requires use of a CA signed certificate.
As you may be aware when you access vCenter for the first time using vSphere Client or vSphere Web Client, you will receive a certificate warning message as the certificate vCenter uses is not signed by a known CA.
Replace vCenter Server Certificate
In this demonstration, I will be using Windows 2003 x64 Server Certificate Authority server, but you can use any CA of your choice.
Step 1
Install OpenSS, then create a private key to be used by the certificate. I created a folder called vCenter_Cert and will save all certificate related file in there.
C:\OpenSSL\bin>mkdir c:\vCenter_Cert

C:\OpenSSL\bin>openssl genrsa -out c:\vCenter_Cert\rui.key
Loading 'screen' into random state - done
Generating RSA private key, 512 bit long modulus
.........++++++++++++
......++++++++++++
e is 65537 (0x10001)
Step 2
Create a certificate request for vCenter Server. You can optionally modify opoenssl.config file to meet your requirement. Please refer to this post for how to modify openssl.config file.
C:\OpenSSL\bin>openssl req -new -key c:\vCenter_Cert\rui.key -out c:\vCenter_Cert\rui.csr
Loading 'screen' into random state - done
You are about to be asked to enter information that will be incorporated
into your certificate request.
What you are about to enter is what is called a Distinguished Name or a DN.
There are quite a few fields but you can leave some blank
For some fields there will be a default value,
If you enter '.', the field will be left blank.
-----
Country Name (2 letter code) [GB]:
State or Province Name (full name) [London]:
Locality Name (eg, city) []:London
Organization Name (eg, company) [Bluebox]:
Organizational Unit Name (eg, section) [VMware]:
Common Name (e.g. server FQDN or YOUR name) []:VC.vm.lab
Email Address [info@bluebox-web.com]:

Please enter the following 'extra' attributes
to be sent with your certificate request
A challenge password []:
An optional company name []:

C:\OpenSSL\bin>
Step 3
Make sure that a private key and certificate request file is created.
Step 4
I used Certificate Service Web Enrolment page to request the certificate for my vCenter Server. For more detail please refer to this post. Make sure to select “Web Server” from Certificate Template type and download a certificate file with Base 64 encoding.
Step 5
Make sure that the certificate file exists.
Step 6
vCenter Server uses x509 certificate file format, so using OpenSSL CLI convert the downloaded certificate file to x509. Make sure that the .crt file is created.
C:\OpenSSL\bin>openssl x509 -in c:\vCenter_Cert\rui.cer -out c:\vCenter_Cert\rui
.crt
C:\OpenSSL\bin>
Step 7
vCenter Server and other infrastructure services require PFX file which includes both certificate file and private key in a single file. Make sure that you enter the password as “testpassword”, otherwise some of the services may not start properly.
C:\OpenSSL\bin>openssl pkcs12 -export -in c:\vCenter_Cert\rui.crt -inkey c:\vCen
ter_Cert\rui.key -name rui -out c:\vCenter_Cert\rui.pfx
Loading 'screen' into random state - done
Enter Export Password: testpassword
Verifying - Enter Export Password: testpassword

C:\OpenSSL\bin>
Step 8
Now all files you need are ready.
Step 9
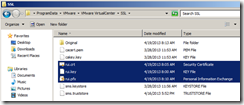
vCenter Server keeps all SSL certificate is the following folder according to the VMware Document
For Windows 2008, the locations are typically:
- C:\Program Data\VMware\VMware VirtualCenter\SSL
- C:\Program Files\VMware\Infrastructure\Inventory Service\SSL
- C:\Program Files\VMware\Infrastructure\vSphere Web Client\DMServer\config\ssl
For Windows 2003, the locations are typically:
- C:\Documents and Settings\All Users\Application Data\VMware\VMware VirtualCenter\SSL
- C:\Documents and Settings\All Users\Application Data\VMware\Infrastructure\Inventory
Service\SSL - C:\Documents and Settings\All Users\VMware\Infrastructure\vSphere Web
Client\DMServer\config\ssl
For some reason I found these folders under the following location. I am using 2008 R2 vSphere 5.1
- C:\Program Data\VMware\VMware VirtualCenter\SSL
- C:\Program Data\VMware\Infrastructure\Inventory Service\ssl
- C:\Program Data\VMware\vSphere Web Client\ssl
There are these three files under each folder. You need to replace these files only. I created a folder and moved these files under the newly created folder.
- rui.key
- rui.crt
- rui.pfx
Step 10
Then copy the private key and certificate files to the each folder location.
Step 11
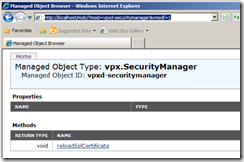
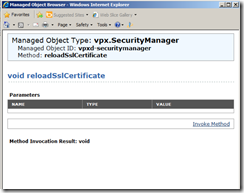
Access vCenter Web service using the URL below. Then click reloadSslCertificate and then on the second page click, Invoke Method. Wait until you see Method Invocation Result: void. message
http://localhost/mob/?moid=vpxd-securitymanager&vmodl=1
Step 12
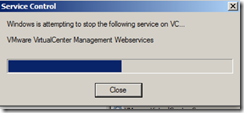
Now Restart vCenter Server Service, Inventory service and Web Client Service.
Step 13
Connect vCenter Server using vSphere Client and notice that you will not be receive a certificate warning message anymore if vCenter Server is a part of AD.
Step 14
You will receive an error message about Update Manager Server cannot be connected as Update Manager connection was made using the previous certificate. You will need to re-configure Update Manager Server using Update Manager Utility. I will upload a separate post about this procedure in near future.
Step 15
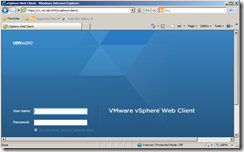
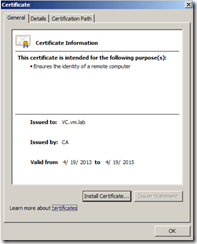
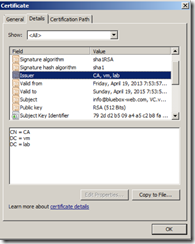
Connect to vCenter Server Web Page and vSphere Web Client. You will not see Red X on the Padlock of the browser bar as the certificate was issued by a trusted CA.





Leave a Reply